
Introduction
This article is a continuation of the article "How to implement Google Analytics via Google Tag Manager". If you want to know the basic configuration of Google Analytics, feel free to read it first.
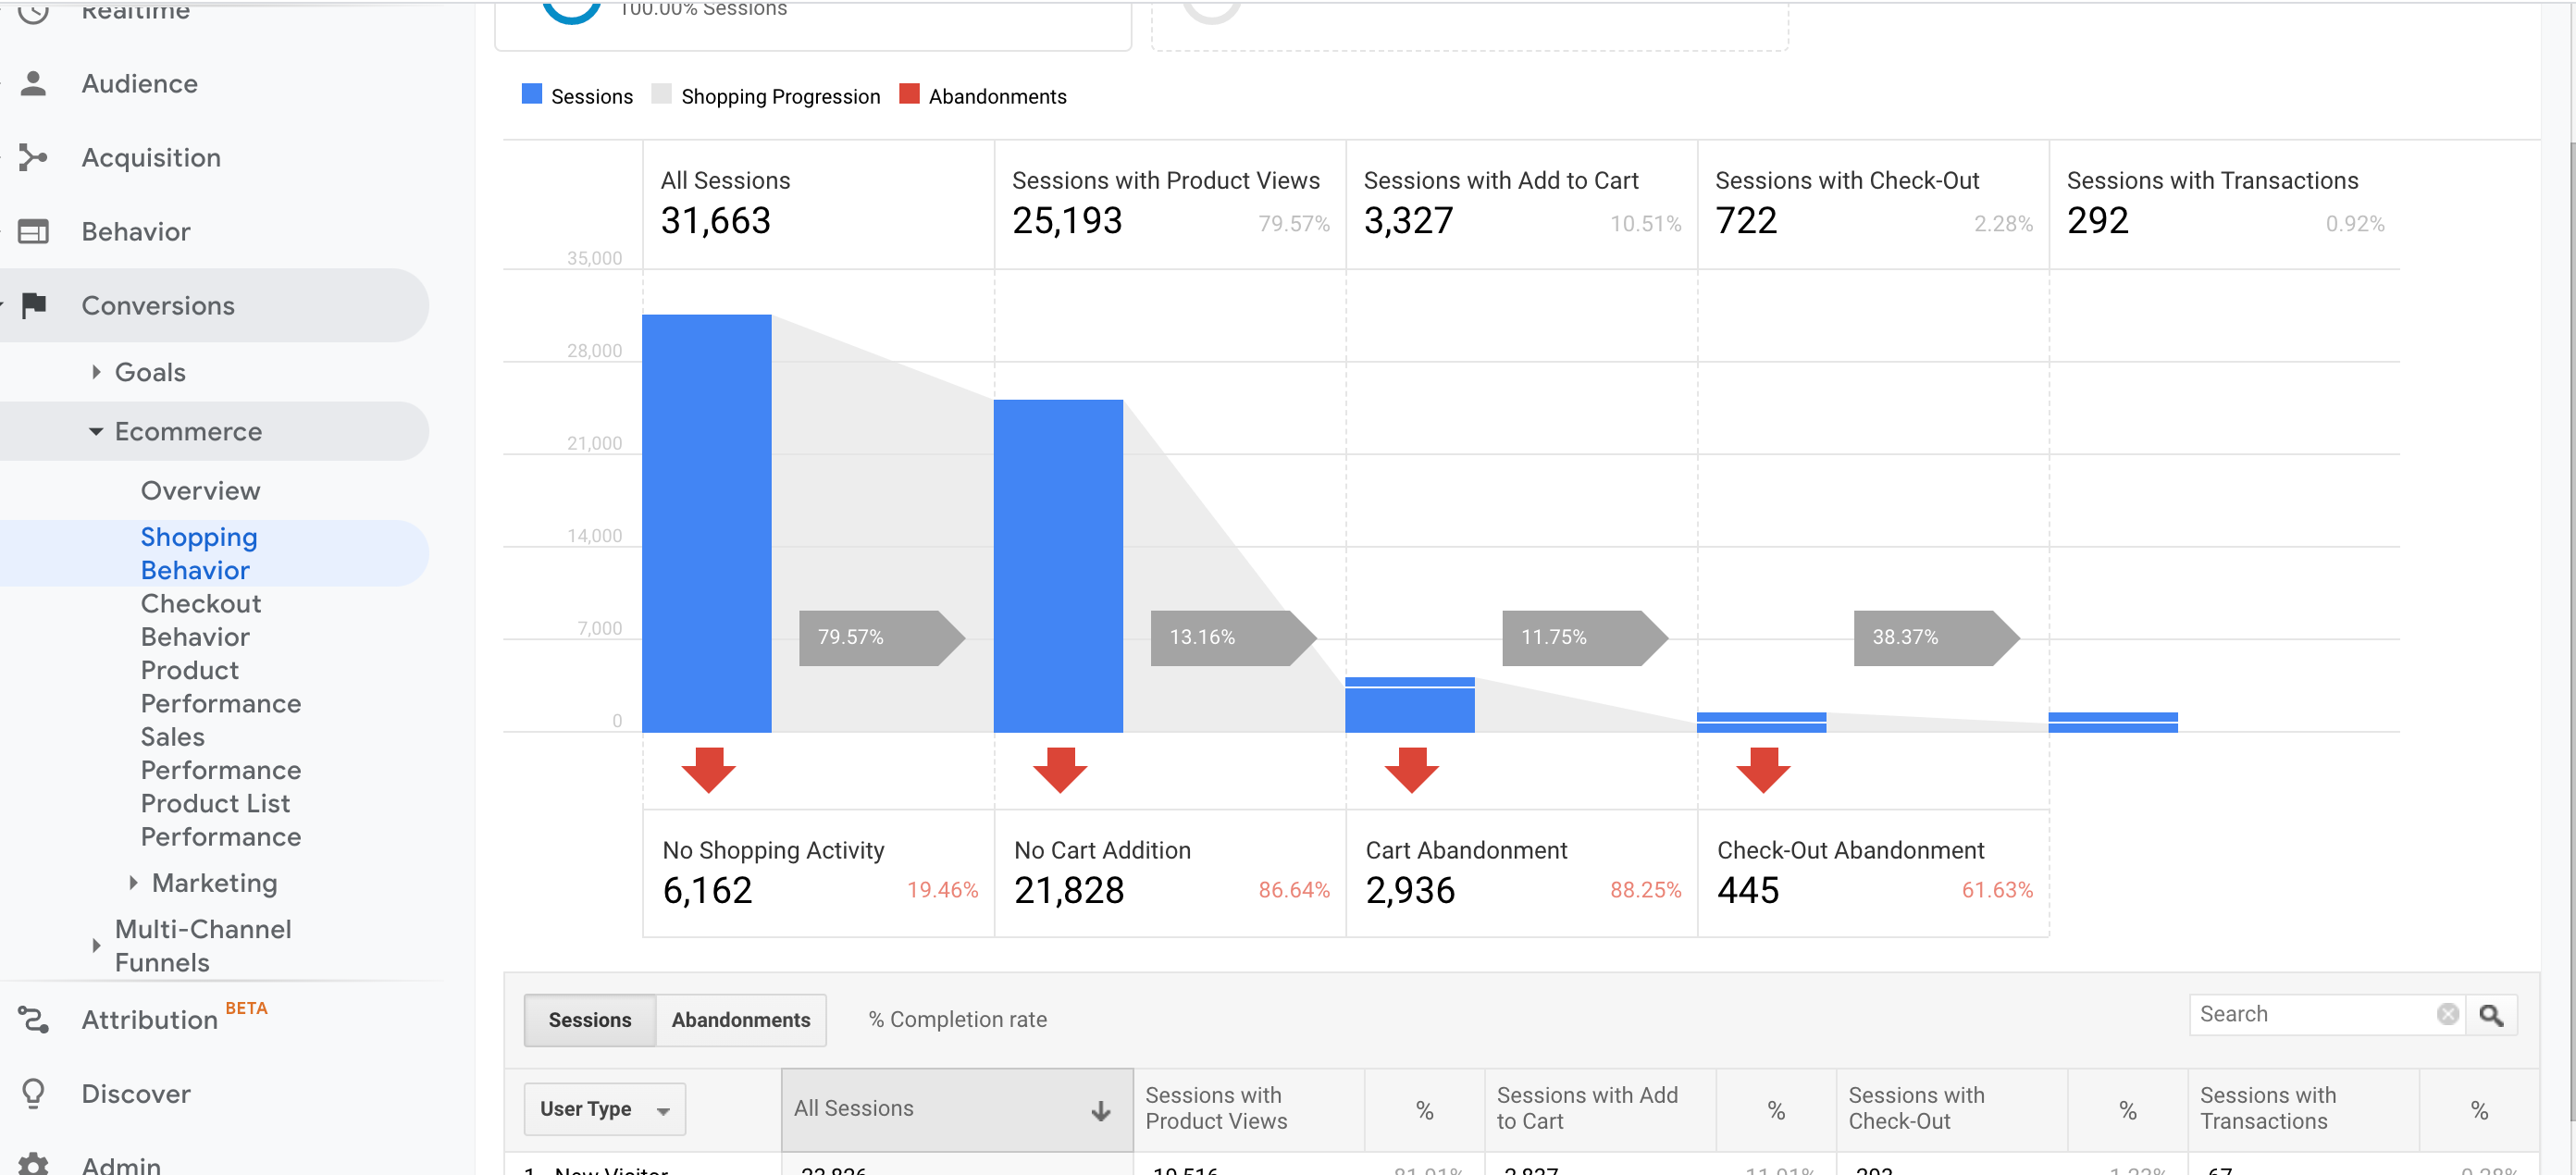
In this article we will take a look at the very important E-commerce plugin, which can be used to track the performance of the sales, conversion rate, and much more valuable KPI's.
E-Commerce Plugin
Implementation from the code perspective is very easy - but you have to stick to some convention, which you can find here: https://developers.google.com/analytics/devguides/collection/ua/gtm/enhanced-ecommerce
That means that you can't create any event you want ( you can do it with "normal" events which are described in the 1st article of the series). In E-commerce plugin you have only the following e-commerce events:
- Product Impressions
- Product Clicks
- Product Detail Impressions
- Add / Remove from Cart
- Promotion Impressions
- Promotion Clicks
- Checkout
- Purchases
- Refunds
In our case we use Product Detail Impression, Add to Cart, Checkout and Purchase - it is enough for our needs but you probably want to adjust those events to your needs.
I'll show the example of one event but remember that they differ a little bit so read carefully the documentation which I've provided above and check if you're sending events in the same shape as in the example in the docs.
Code Implementation
So let's go with the e-commerce event! I've chosen a checkout event for you because I want to show you also how you can adjust it to your individual needs and reflect the checkout process from your current shop.
function onCheckout() {
  dataLayer.push({ ecommerce: null });  // Clear the previous ecommerce object.
  dataLayer.push({
    'event': 'checkout',
    'ecommerce': {
      'checkout': {
        'actionField': {'step': 1, 'option': 'Visa'},
        'products': [{
          'name': 'Triblend Android T-Shirt',
          'id': '12345',
          'price': '15.25',
          'brand': 'Google',
          'category': 'Apparel',
          'variant': 'Gray',
          'quantity': 1
       }]
     }
   }
  });
}
This is the example from the docs. What I want to point here is the ecommerce key - it's crucial to make this work - because Google Tag Manager layer will try to find this key and push it further to Google Analytics to the plugin and not to the normal events. Actually, there is one general rule - keys are important and are not changeable - here you have checkout key and you can't name it in other way.
Google Analytics settings
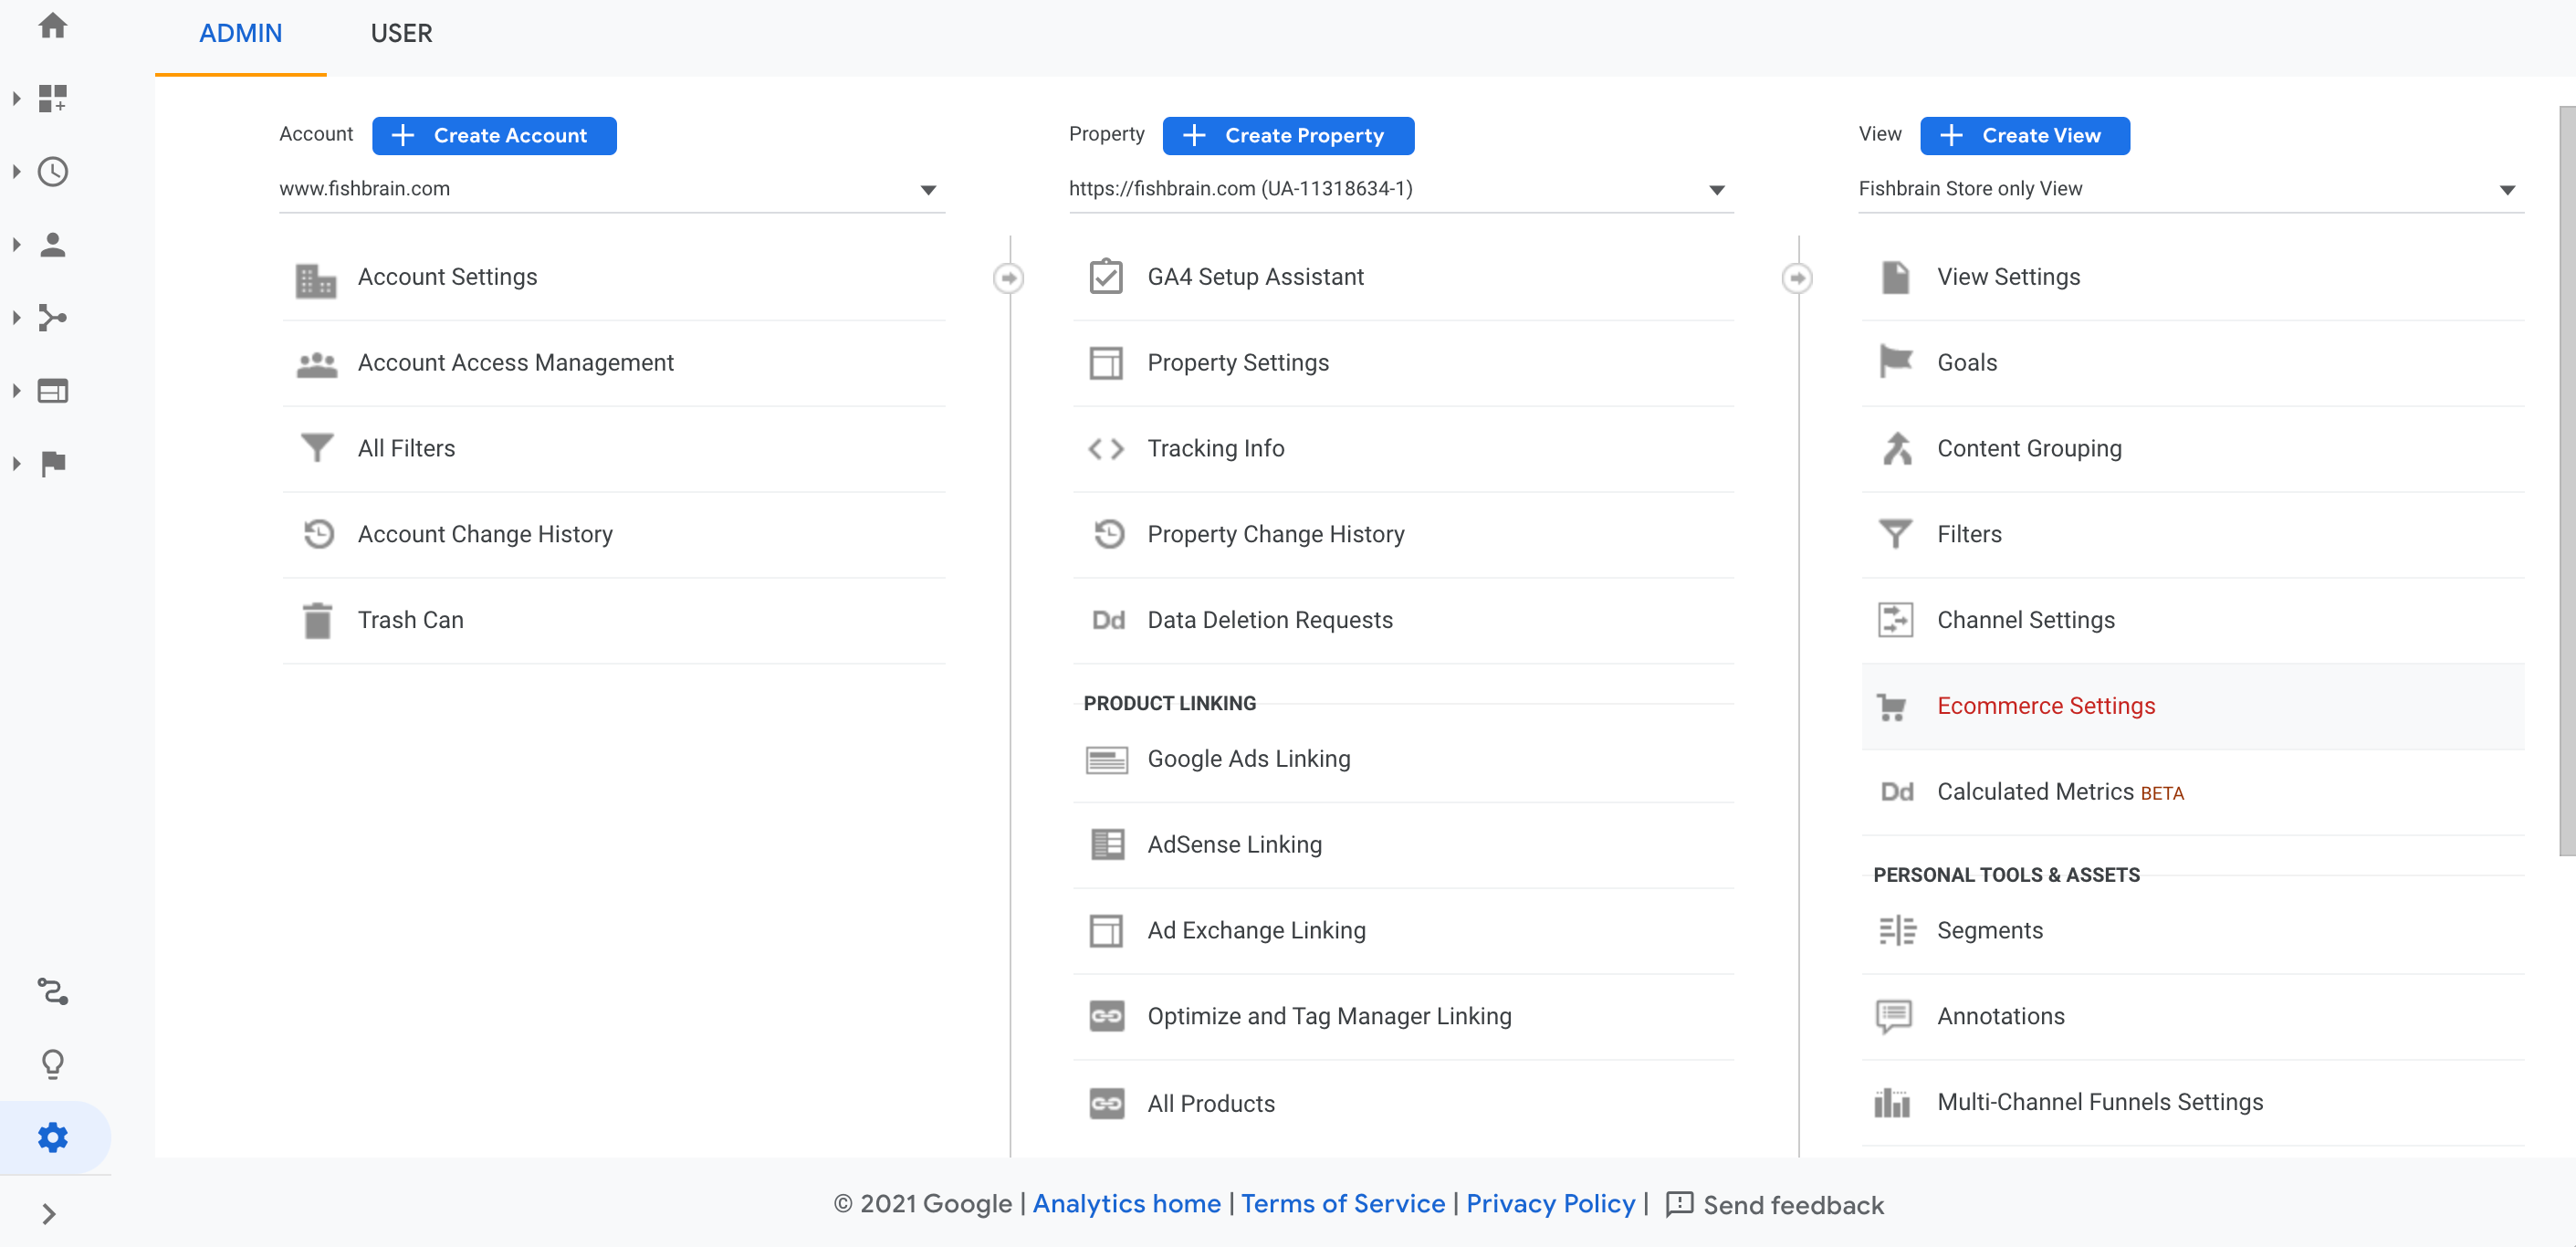
What's interesting in the checkout event is actionField - this key is used to send additional parameters to ecommerce events. In case of checkout, you can send what step of checkout it is - it can be "checkout page view", "Pay now button clicked" or whatever your process looks like. Additionally, you can name the steps in Google Analytics settings. Go to Admin → Ecommerce settings → Checkout Labeling section . You can add there as many steps as you plan to send from the code. Then you will see nice checkout behavior. (I have only one step so it does not look so impressive).


GTM implementation
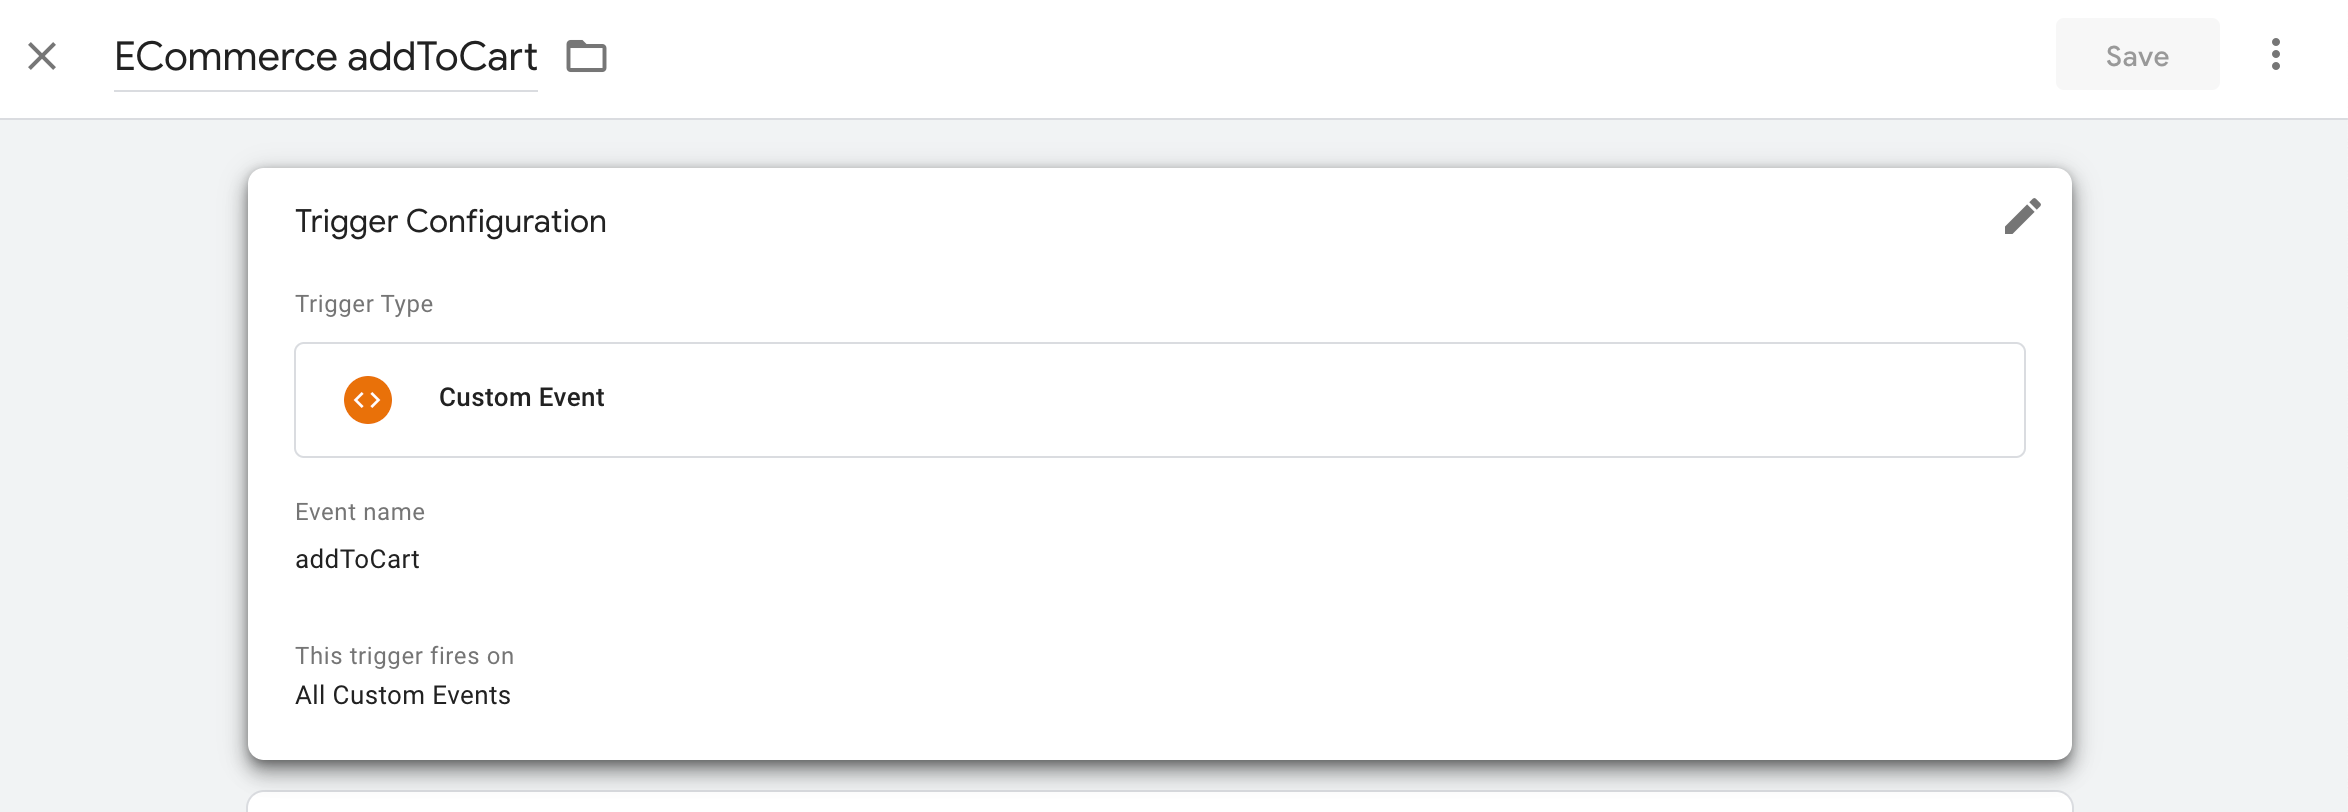
Ok, but how to make the e-commerce event to show in GA console in the first place. We have to use Google Tag Manager and create tags and triggers. We start from Trigger - here we use CustomEvent and we name it as we want.
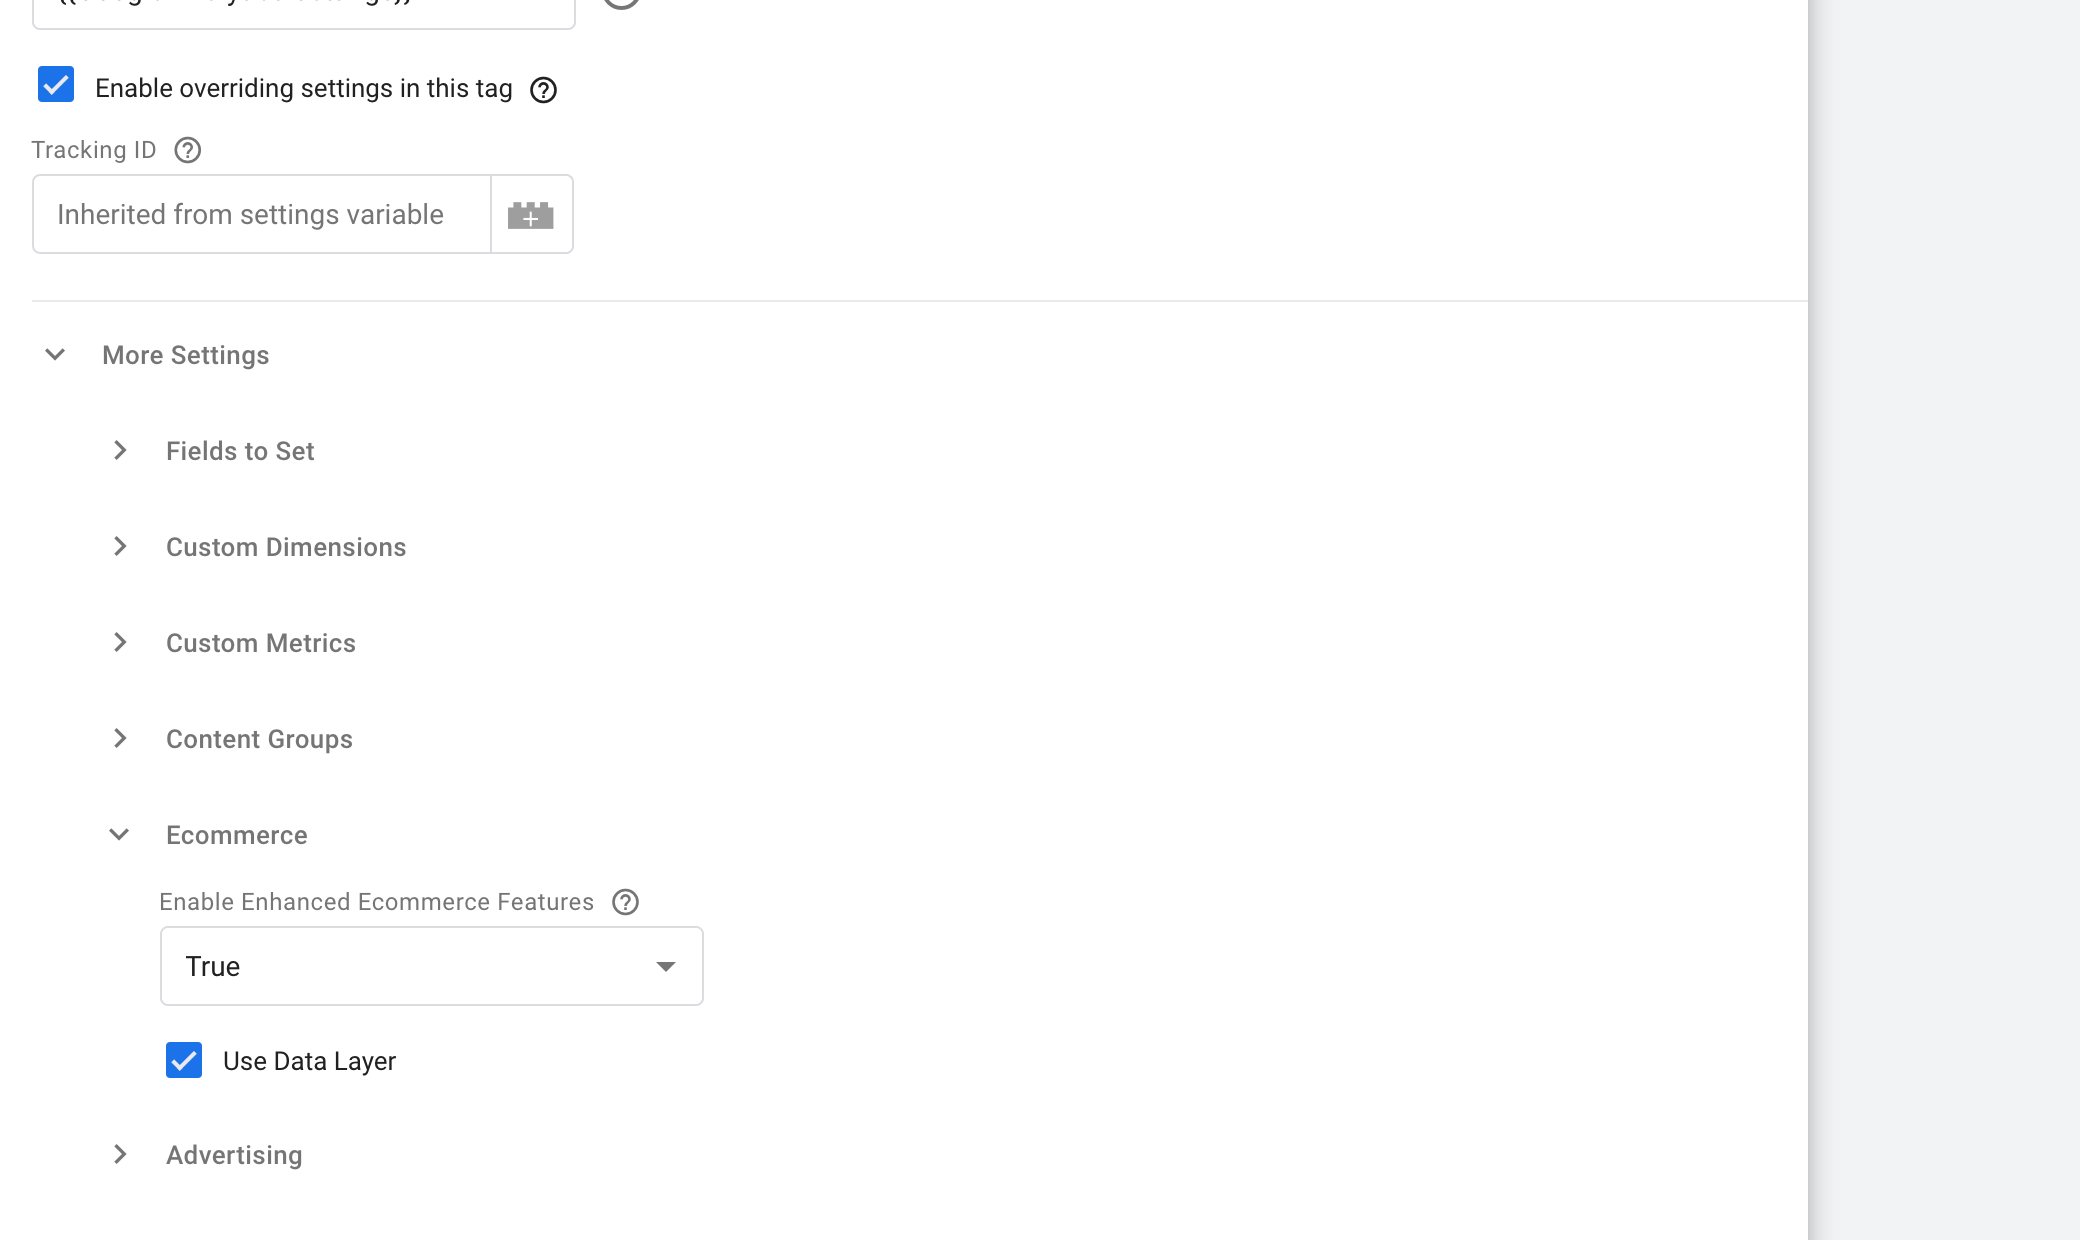
Then we're moving to set up the tag - here we need to let the Google Tag Manager know that we expect e-commerce event. To do that we have to check the checkbox Enable overriding settings in this tag and then check e-commerce section:
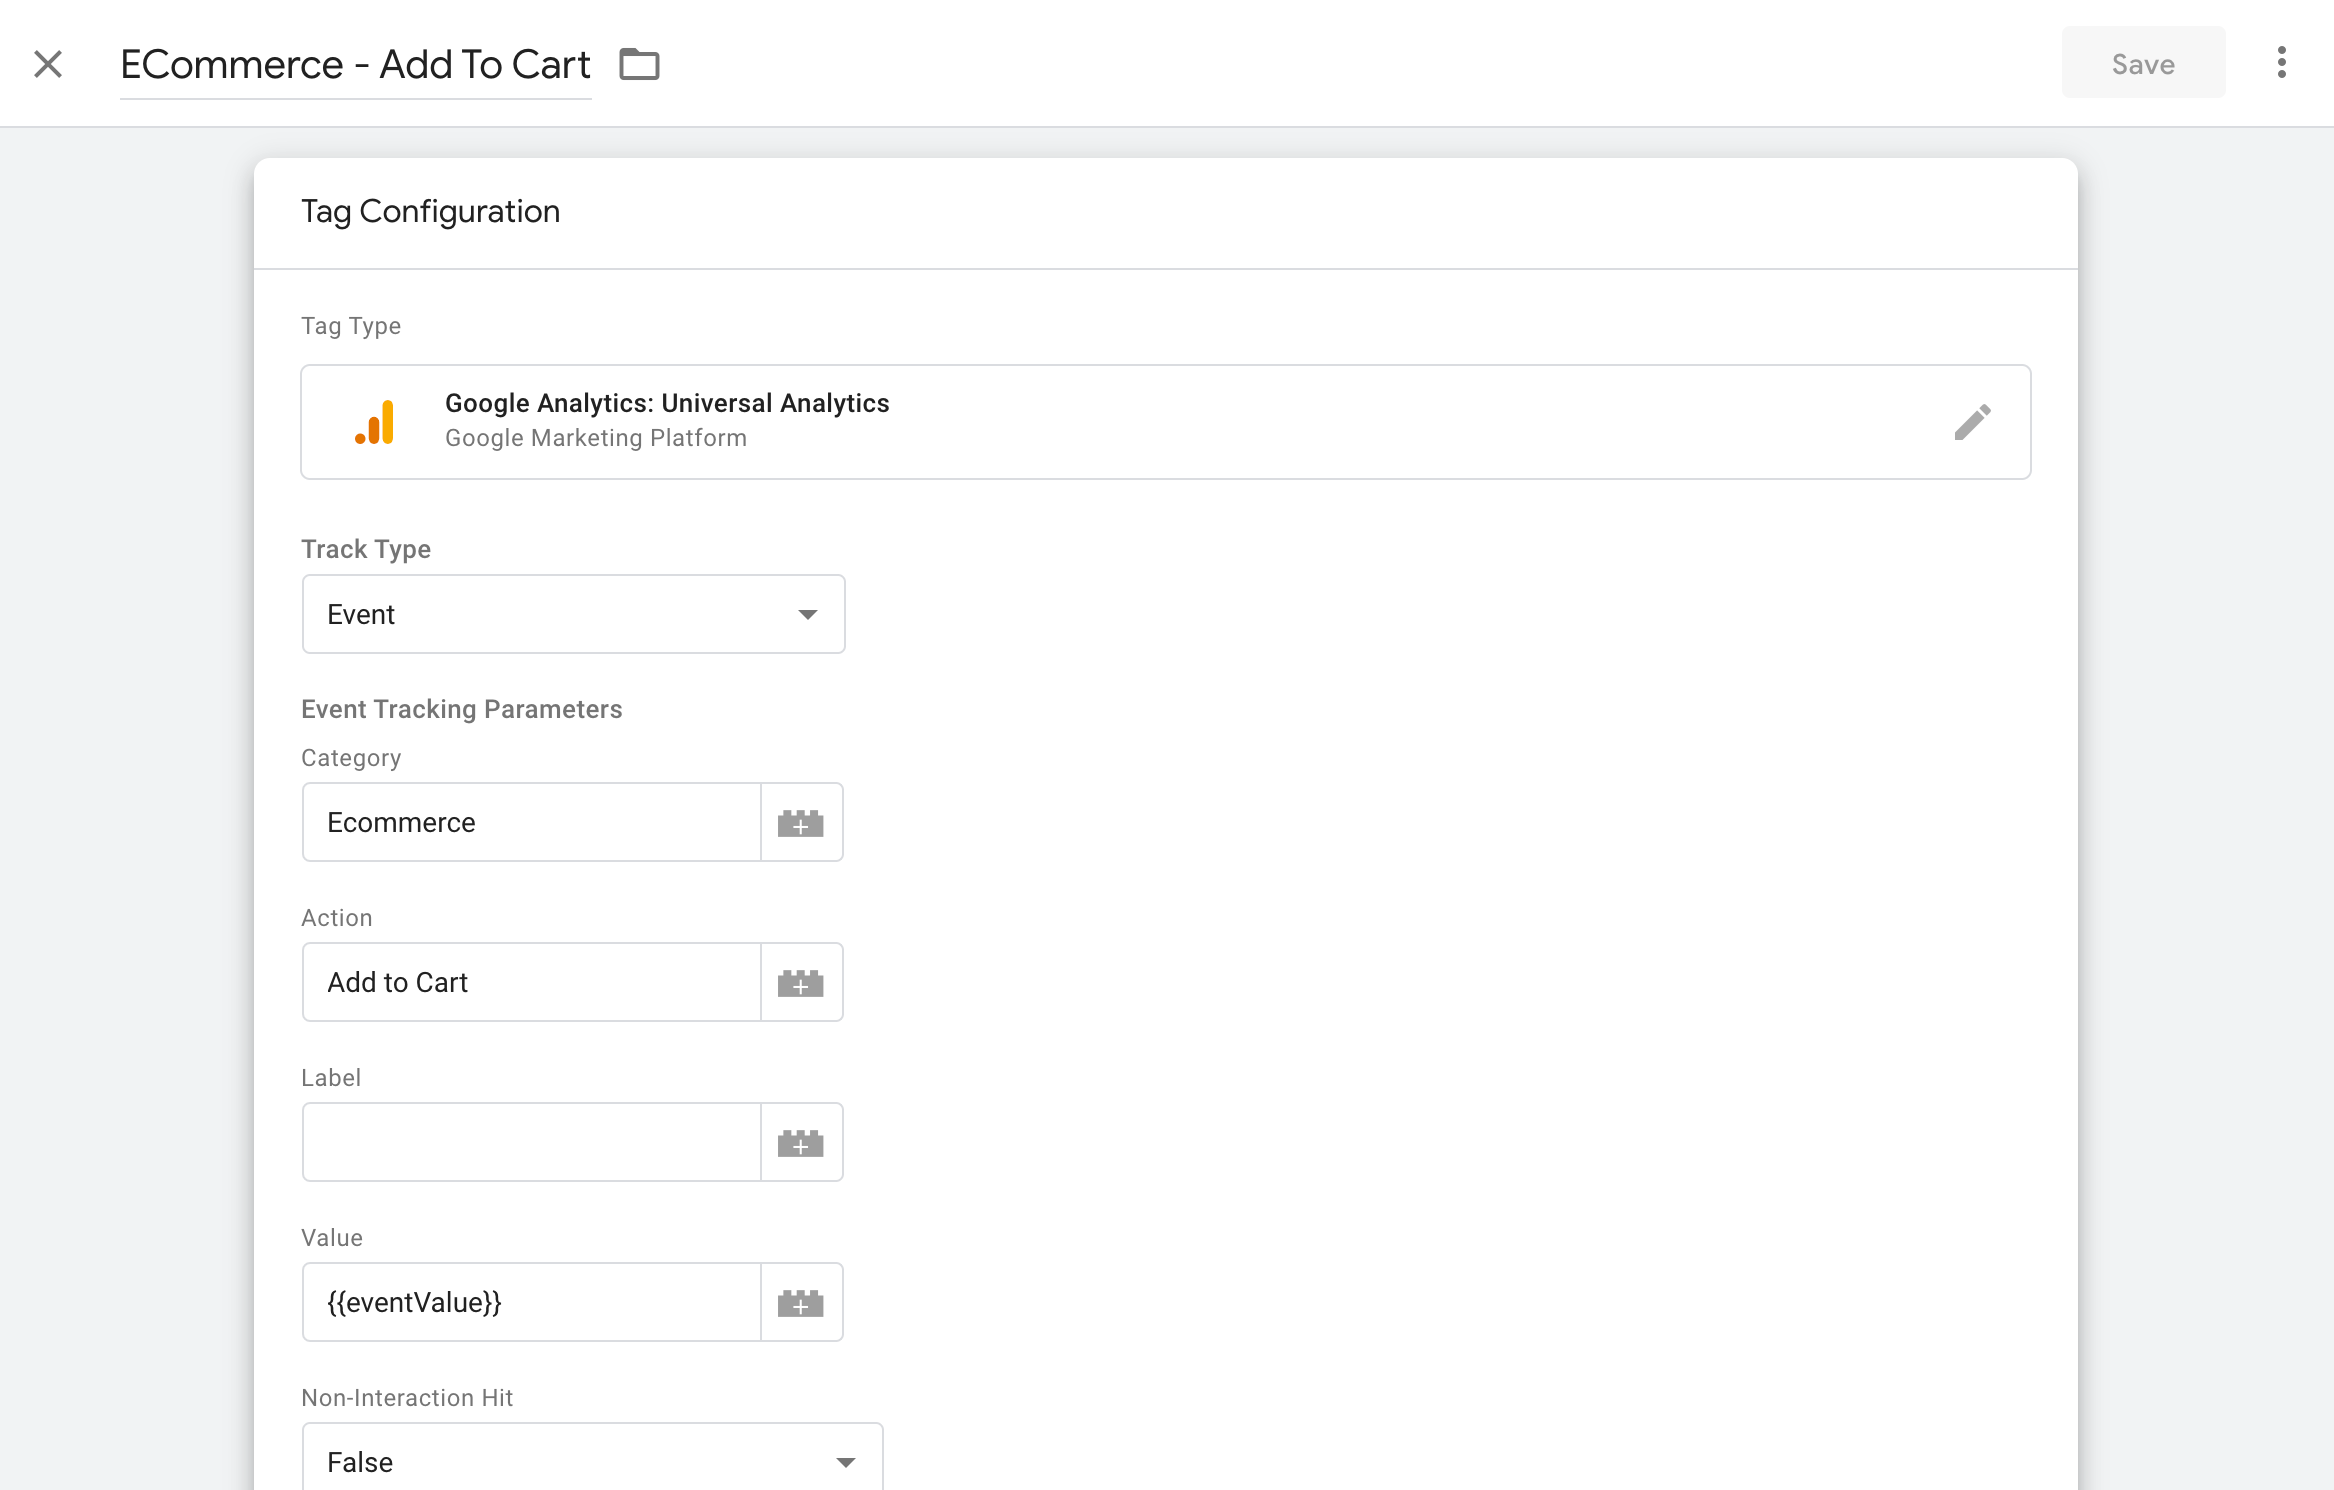
The first part is less important - here you can name the Tag as you want. If you already have "normal event" add to cart you probably want to check Non-Interaction Hit as true. For more details with Non-Interaction Hit option check GA Trouble shooting article from this series. And if you have a problem with user path related to organic search vs paid search check GA Trouble shooting article from this series.
E-commerce plugin is a powerful tool and we have a lot of options to measure the performance of our shop.