Introduction
Implementing analytics from scratch could be problematic especially when your app is already integrated with google tag manager and it would be expected to use this tool to send analytic events via this tool. In most e-commerce solutions analytics are handled by external services. Together with GTM comes a need to make some configuration in Google Tag Manager console - and this in my opinion can be the most tricky part. We have to ensure that our analytic events will be captured and properly guided to the Google Analytics Console.
Code Implementation
Starting from the beginning, here is the setup for Google Tag Manager.
<script>
  dataLayer = [];
</script>
<script>
    (function(w,d,s,l,i){
        w[l]=w[l]||[];
        w[l].push({
            'gtm.start':new Date().getTime(),
             event:'gtm.js'
        });
        var f=d.getElementsByTagName(s)[0],
        j=d.createElement(s),
                dl=l!='dataLayer' ? '&l='+l : '' ;
        j.async=true;
        j.src='https://www.googletagmanager.com/gtm.js?id='+i+dl;f.parentNode.insertBefore(j,f);
   })(window,document,’script’,’dataLayer’,YOUR_GTM_ID_HERE>)
</script>
Probably you want to put it somewhere in your template file in <head></head>
And from this moment you have access to window.dataLayer object where you can pass your analytic events. An easy example for custom Event:
window.dataLayer.push({
    event: ’ShopEvent’,
  eventCategory: ’add to cart’,
  eventLabel: ‘product-12345’,
  eventAction: ’click’,
  eventValue: 127.00,
});
The work from the code perspective is basically done. Now we have to set it in Google Analytics Console.
GTM Implementation
If there is no analyst who is experienced with GTM and GA configuration then it will be your responsibility to set it properly.
Why do we have so many options and types in Google Tag Manager? GTM is very powerful and allows to provide integrations with Facebook, Google Ads, Bing, Criteo and a lot of more tools (mostly for marketing but not only). It allows injecting some html into the web page where GTM is configured. It can track page route changes. You can use it to AB tests, to Google Optimize - so that’s why this setup is so complex and that’s why we have to tell GTM exactly what we want and how we want to use the data from dataLayer.
In our configuration we'll start from the bottom, so from the smallest thing - the variables - what are variables in Google vocabulary? This is all we want to use inside GTM - in our example variables would be properties sent in the push method. Example: eventCategory - if we want to pass this further we have to transform it into GTM variable. How to do it?
Go to the variables tab and you’ll see there two sections: :"Built-in variables" and "user-defined variables". What you need is "user-defined variables", because we’re adding here some custom variable as eventCategory. This setup is very intuitive, one thing you have to remember is to use the type “Data Layer Variable”.
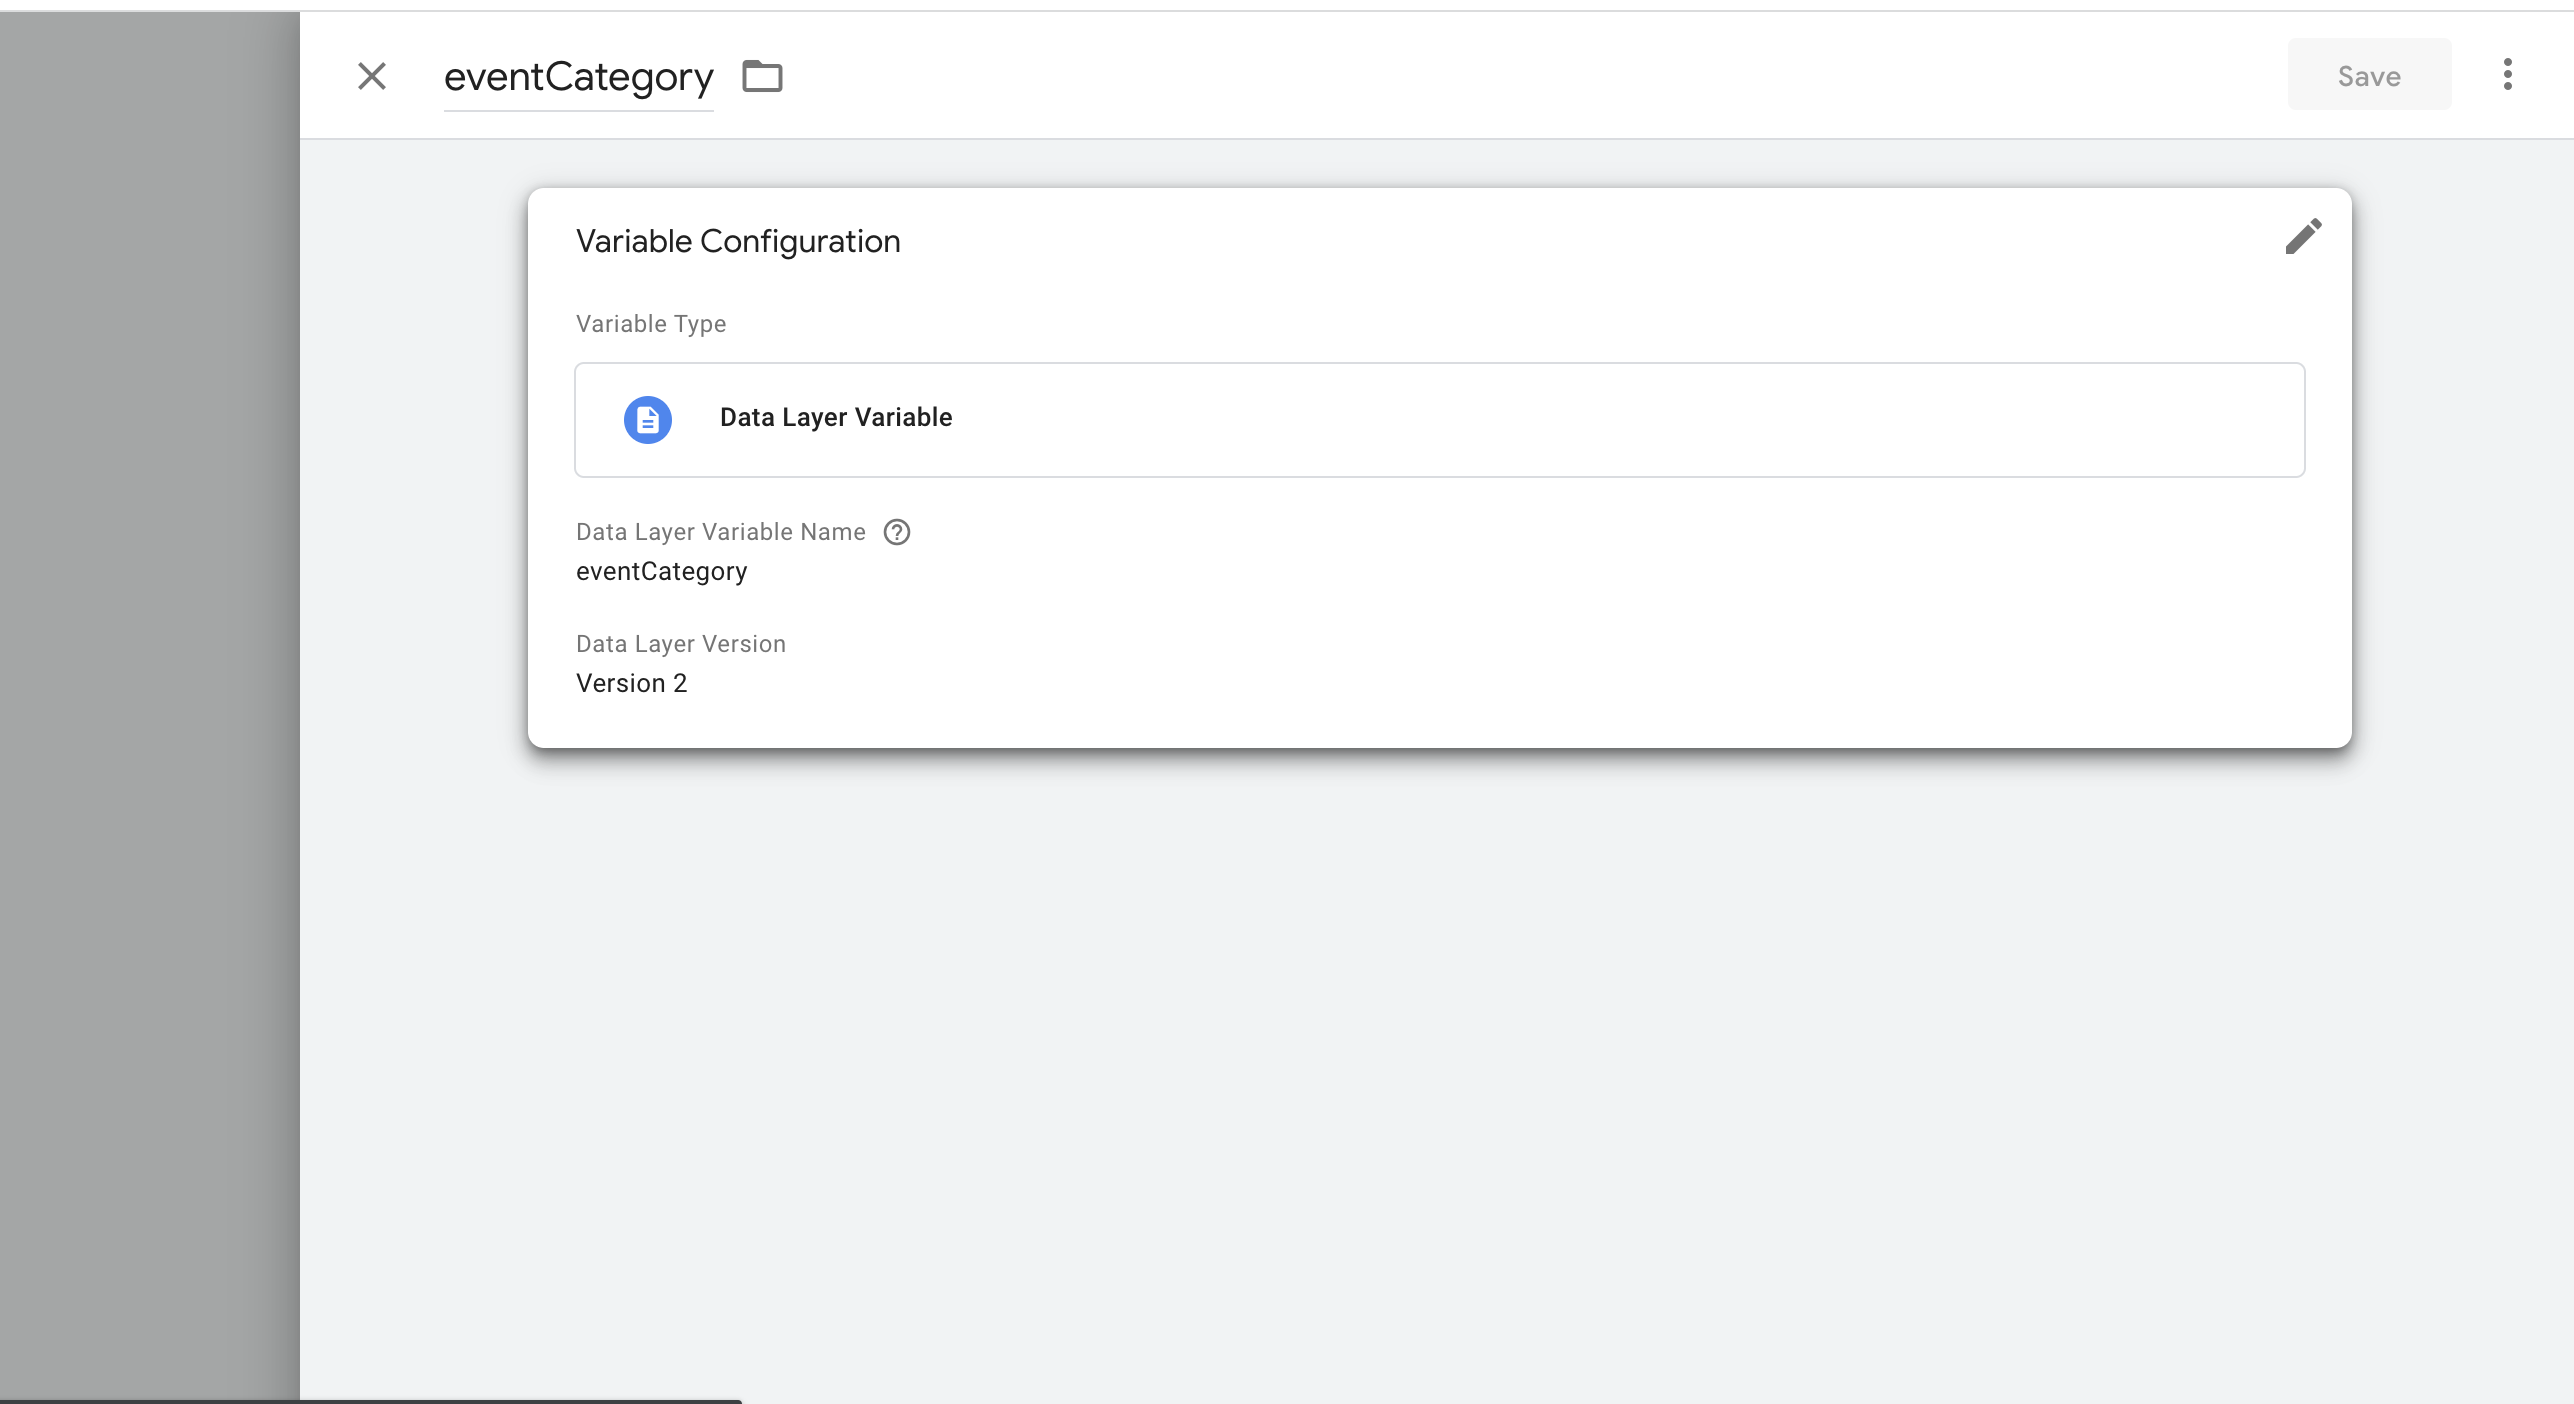
Let’s do this for all the variables we send from code (expect event - I'll explain it later).
Now we can move to operation - create Trigger, which will be responsible to watch dataLayer and react when some analytic event will meet the condition, which we’ll create in a second.
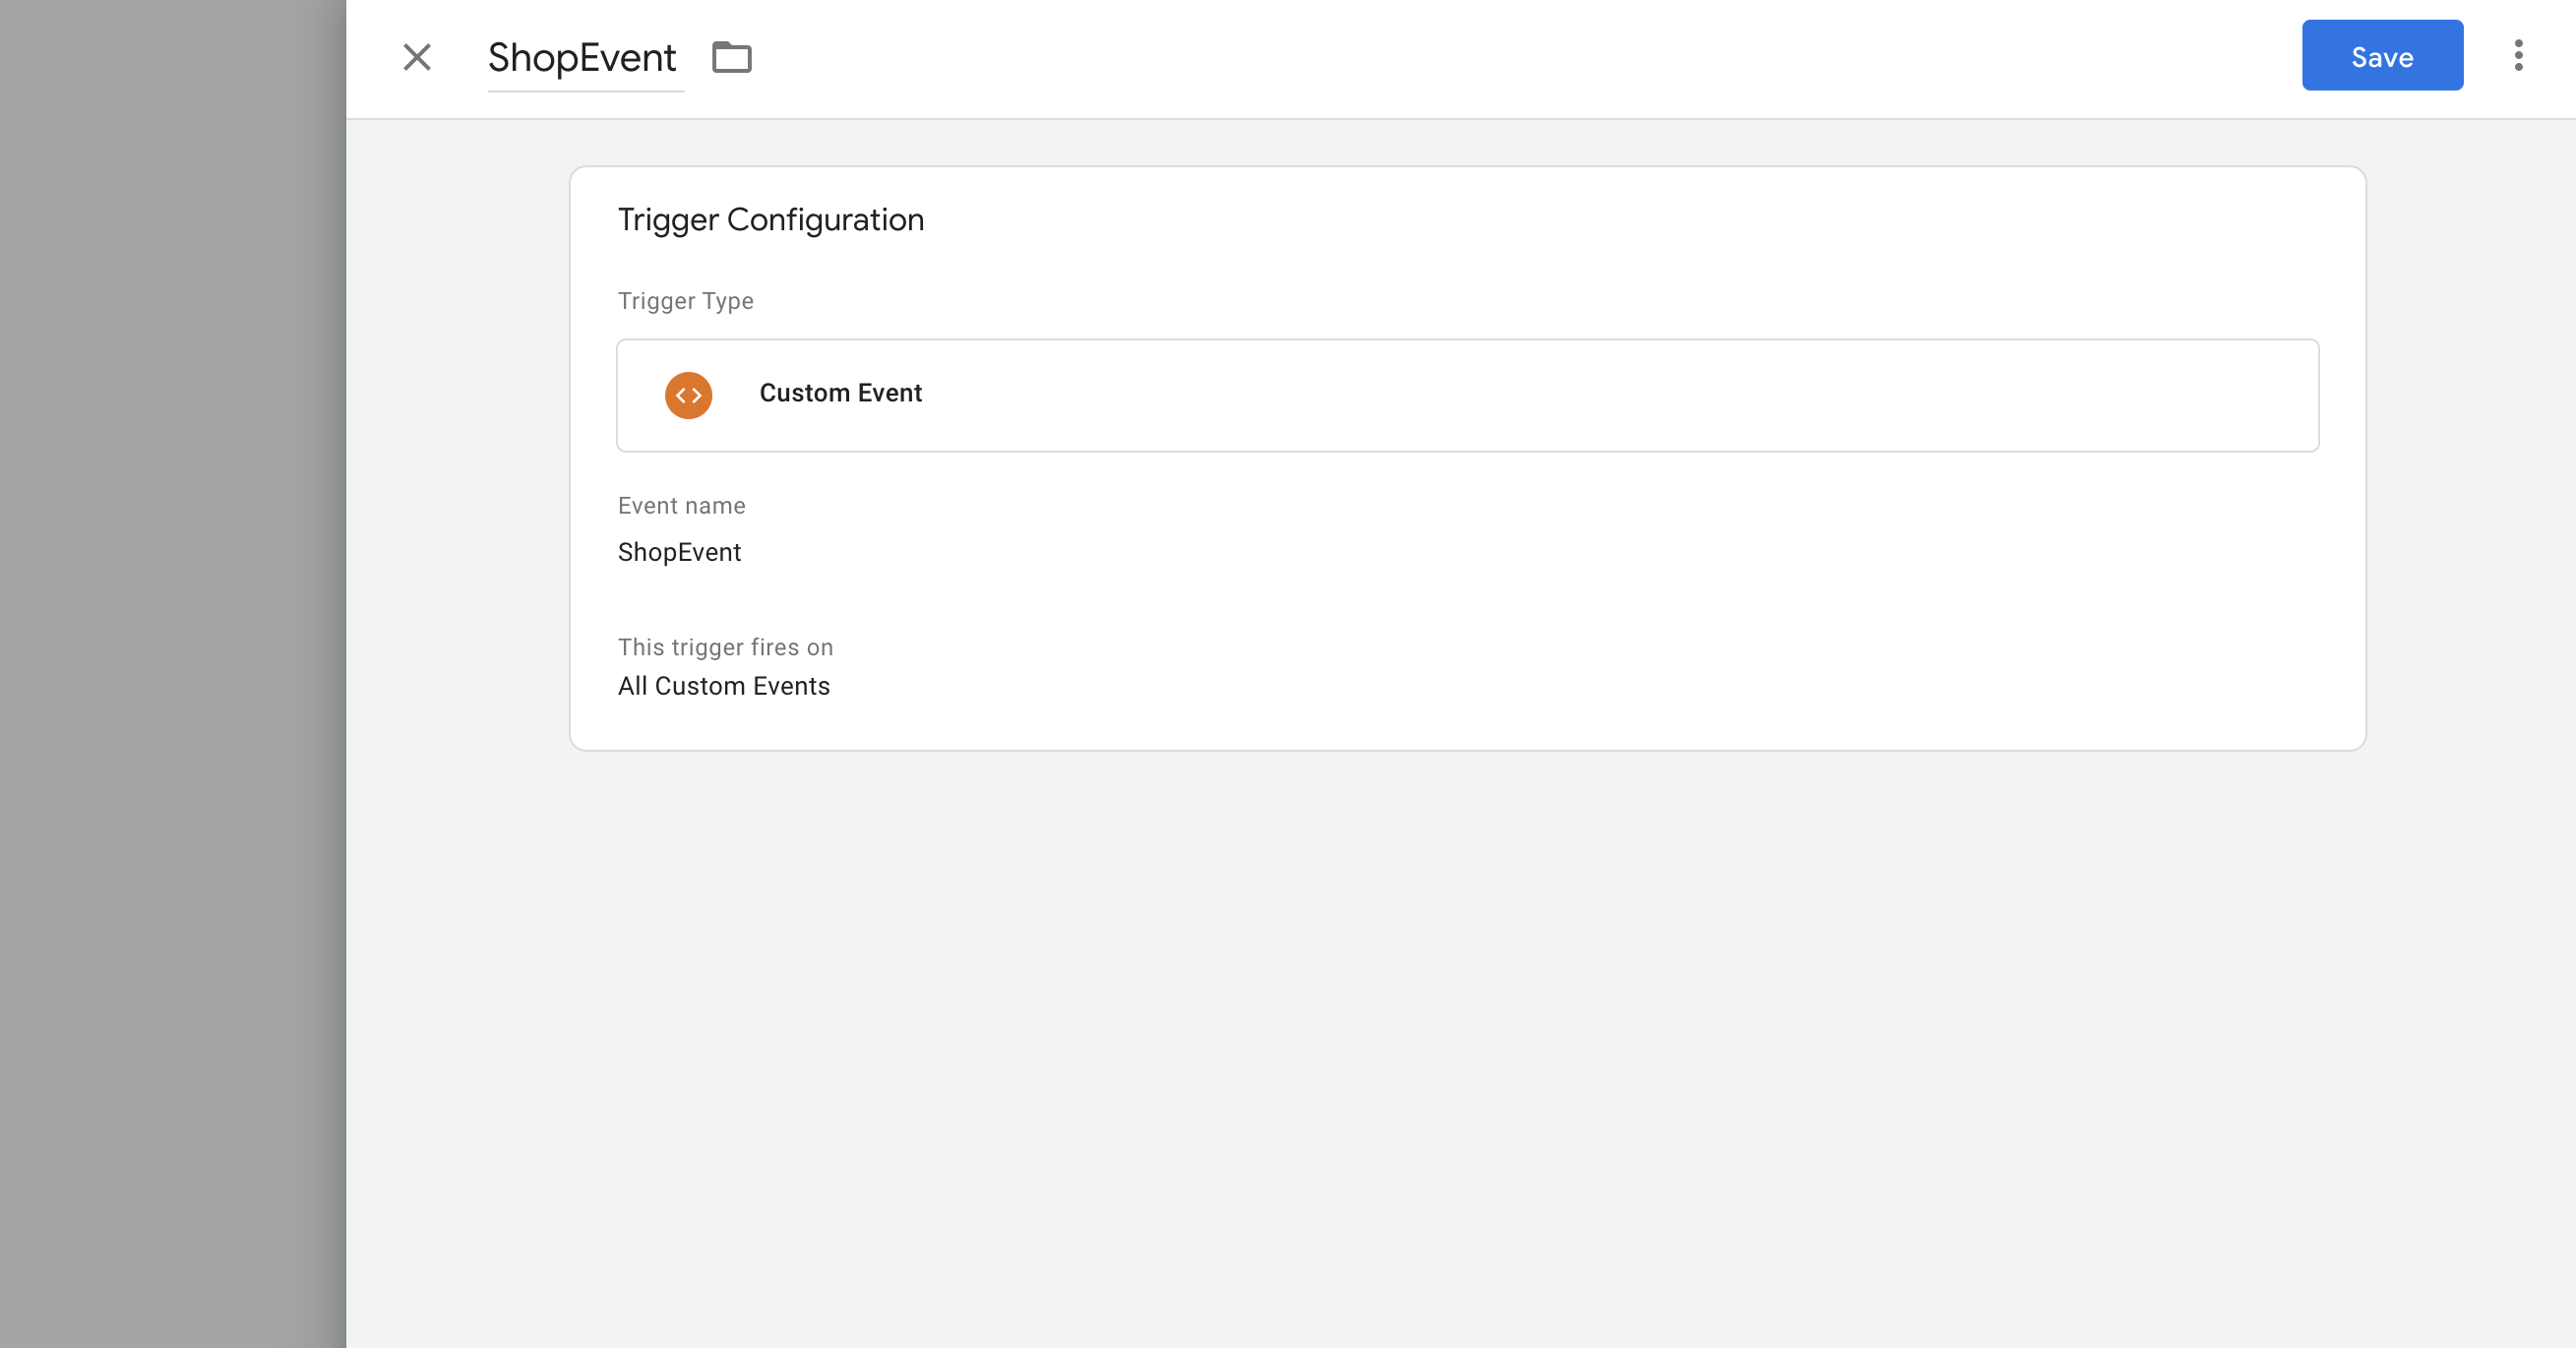
Creating Trigger is also very easy - here you have to choose “Custom Event” as a Trigger Type. What we want to check is the name of the analytic event so we need to compare the value of event in our code with this one specified in trigger. Let’s remind our code which we send:
window.dataLayer.push({
    event: ’ShopEvent’,
  eventCategory: ’add to cart’,
  eventLabel: ‘product-12345’,
  eventAction: ’click’,
  eventValue: 127.00,
});
So our analytic event name is “ShopEvent” - notice that we didn’t have to define variable event it’s a default variable so we can use it right away in the Trigger.
Okey, we have variables, trigger - now the most important thing. The brain will combine this all and pass it further to the Google Analytics console - so to our desired destination.
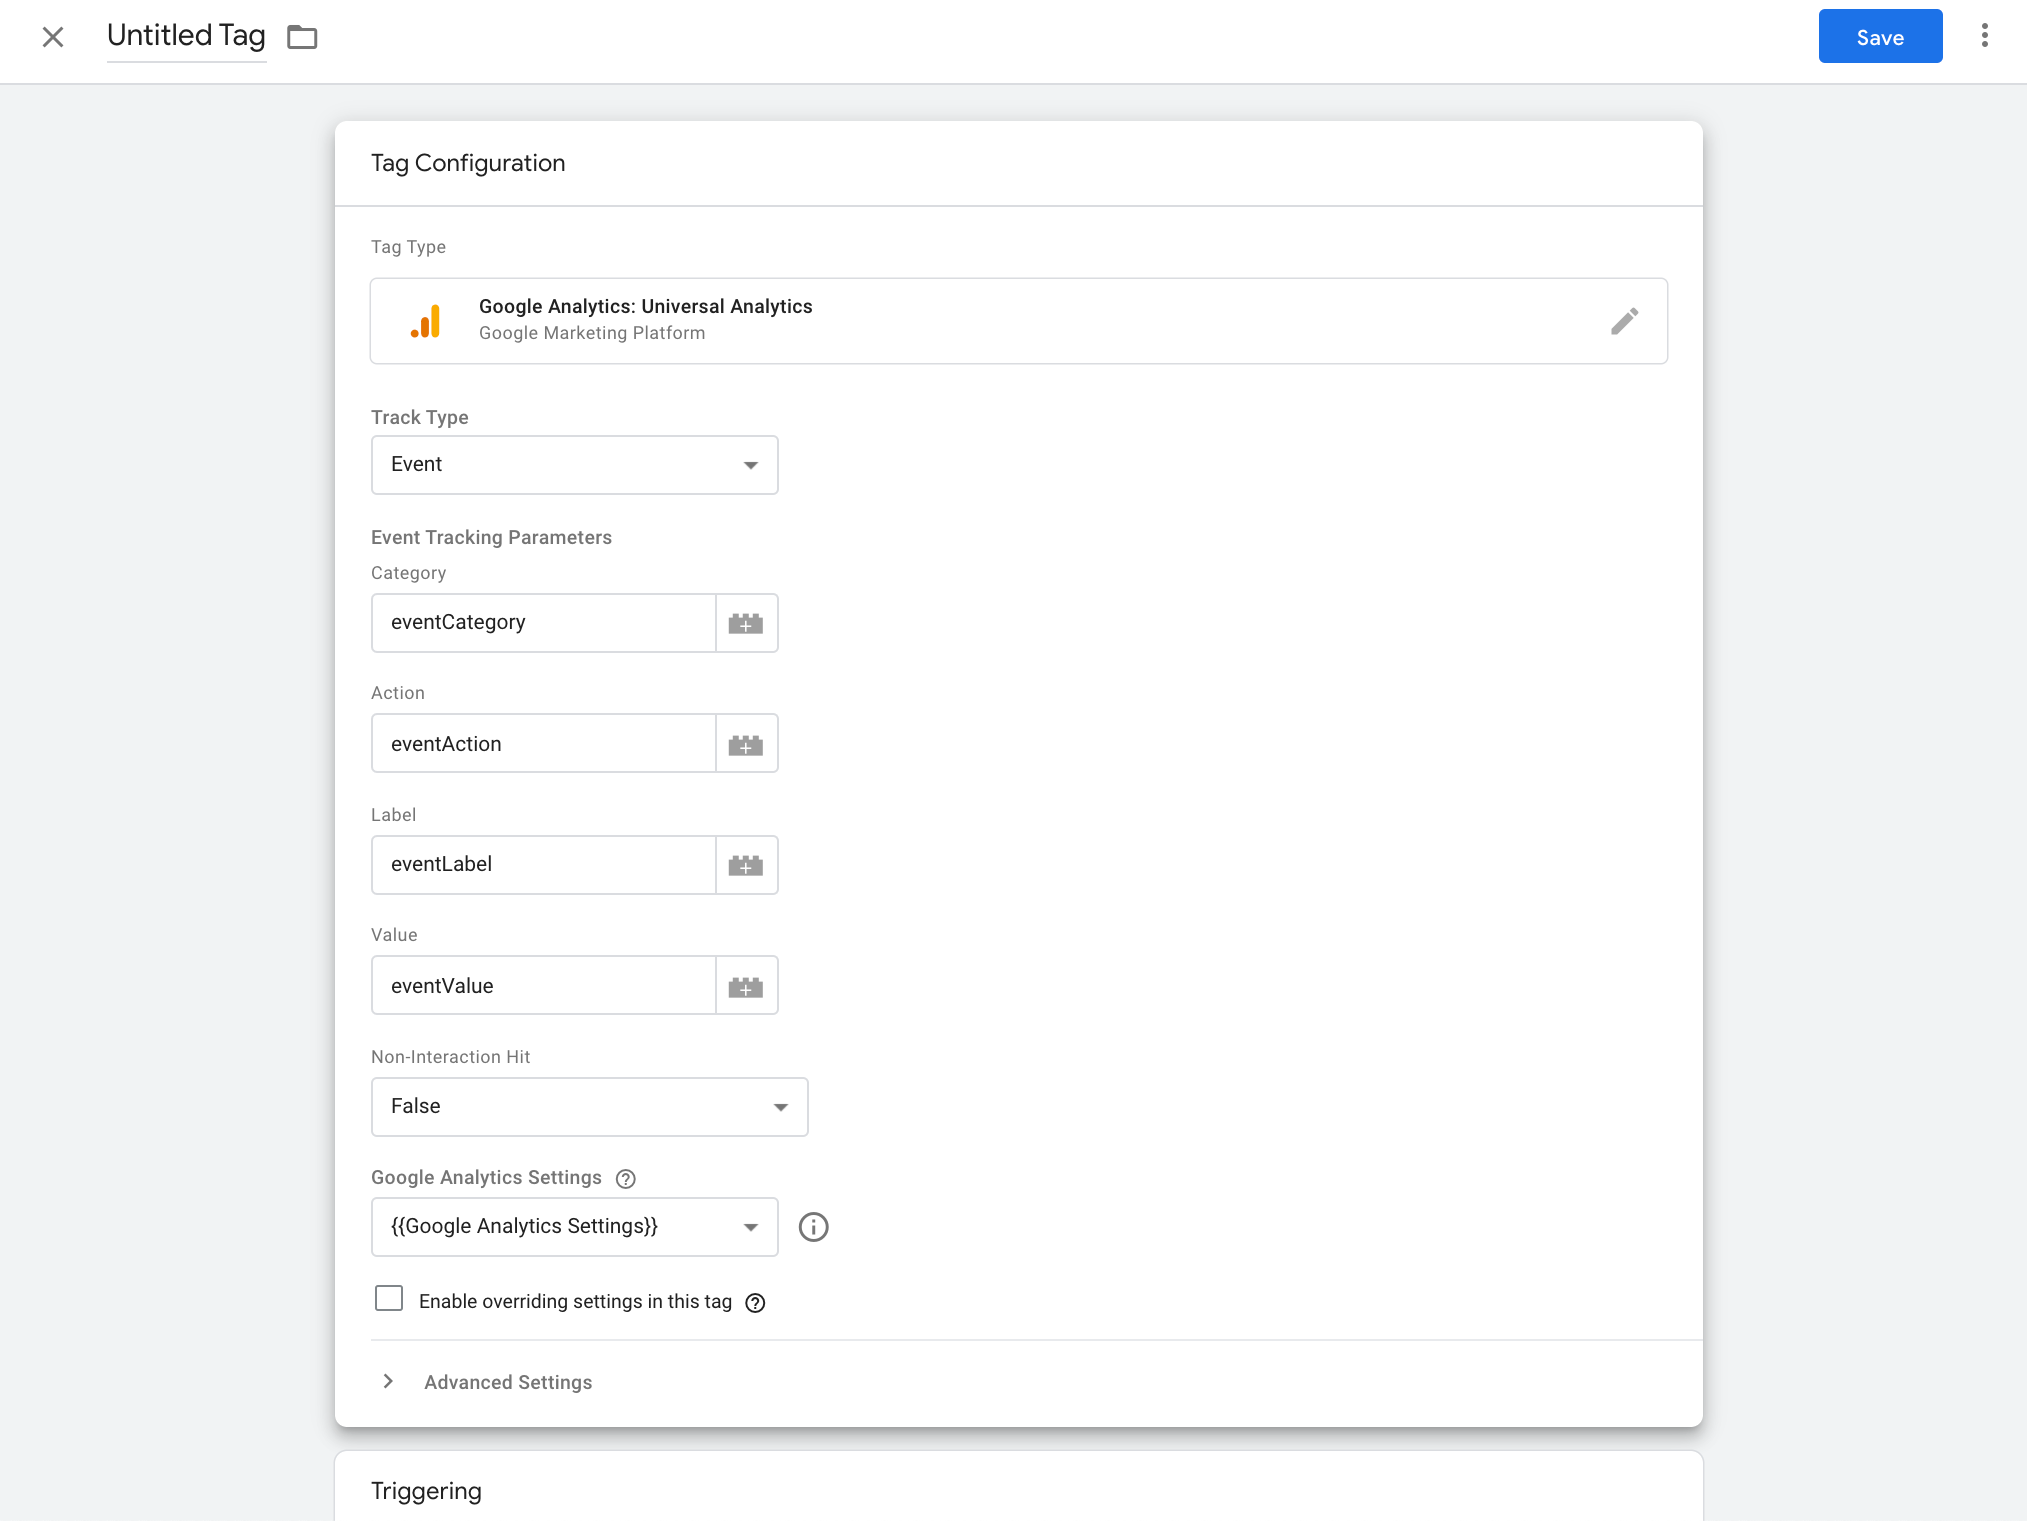
While Creating a Tag we have to provide where our Tag should provide - in our case to Google Analytics - that’s why we use Google Analytics: Universal Analytics as a type here. Track type is an event - as we declared in a trigger that we will use for this purpose CustomEvent. Then we have 4 values accessible parameters - we can use here variables or provided static text.
Under Tag setup we have a place to choose which Trigger we want to set for this tag (Triggering section) - it can be multiple triggers - but in our case, it will be only ShopEvent trigger.
Google Analytics console
And now we have the setup complete - let’s see in Google Analytics Console if it is captured correctly.
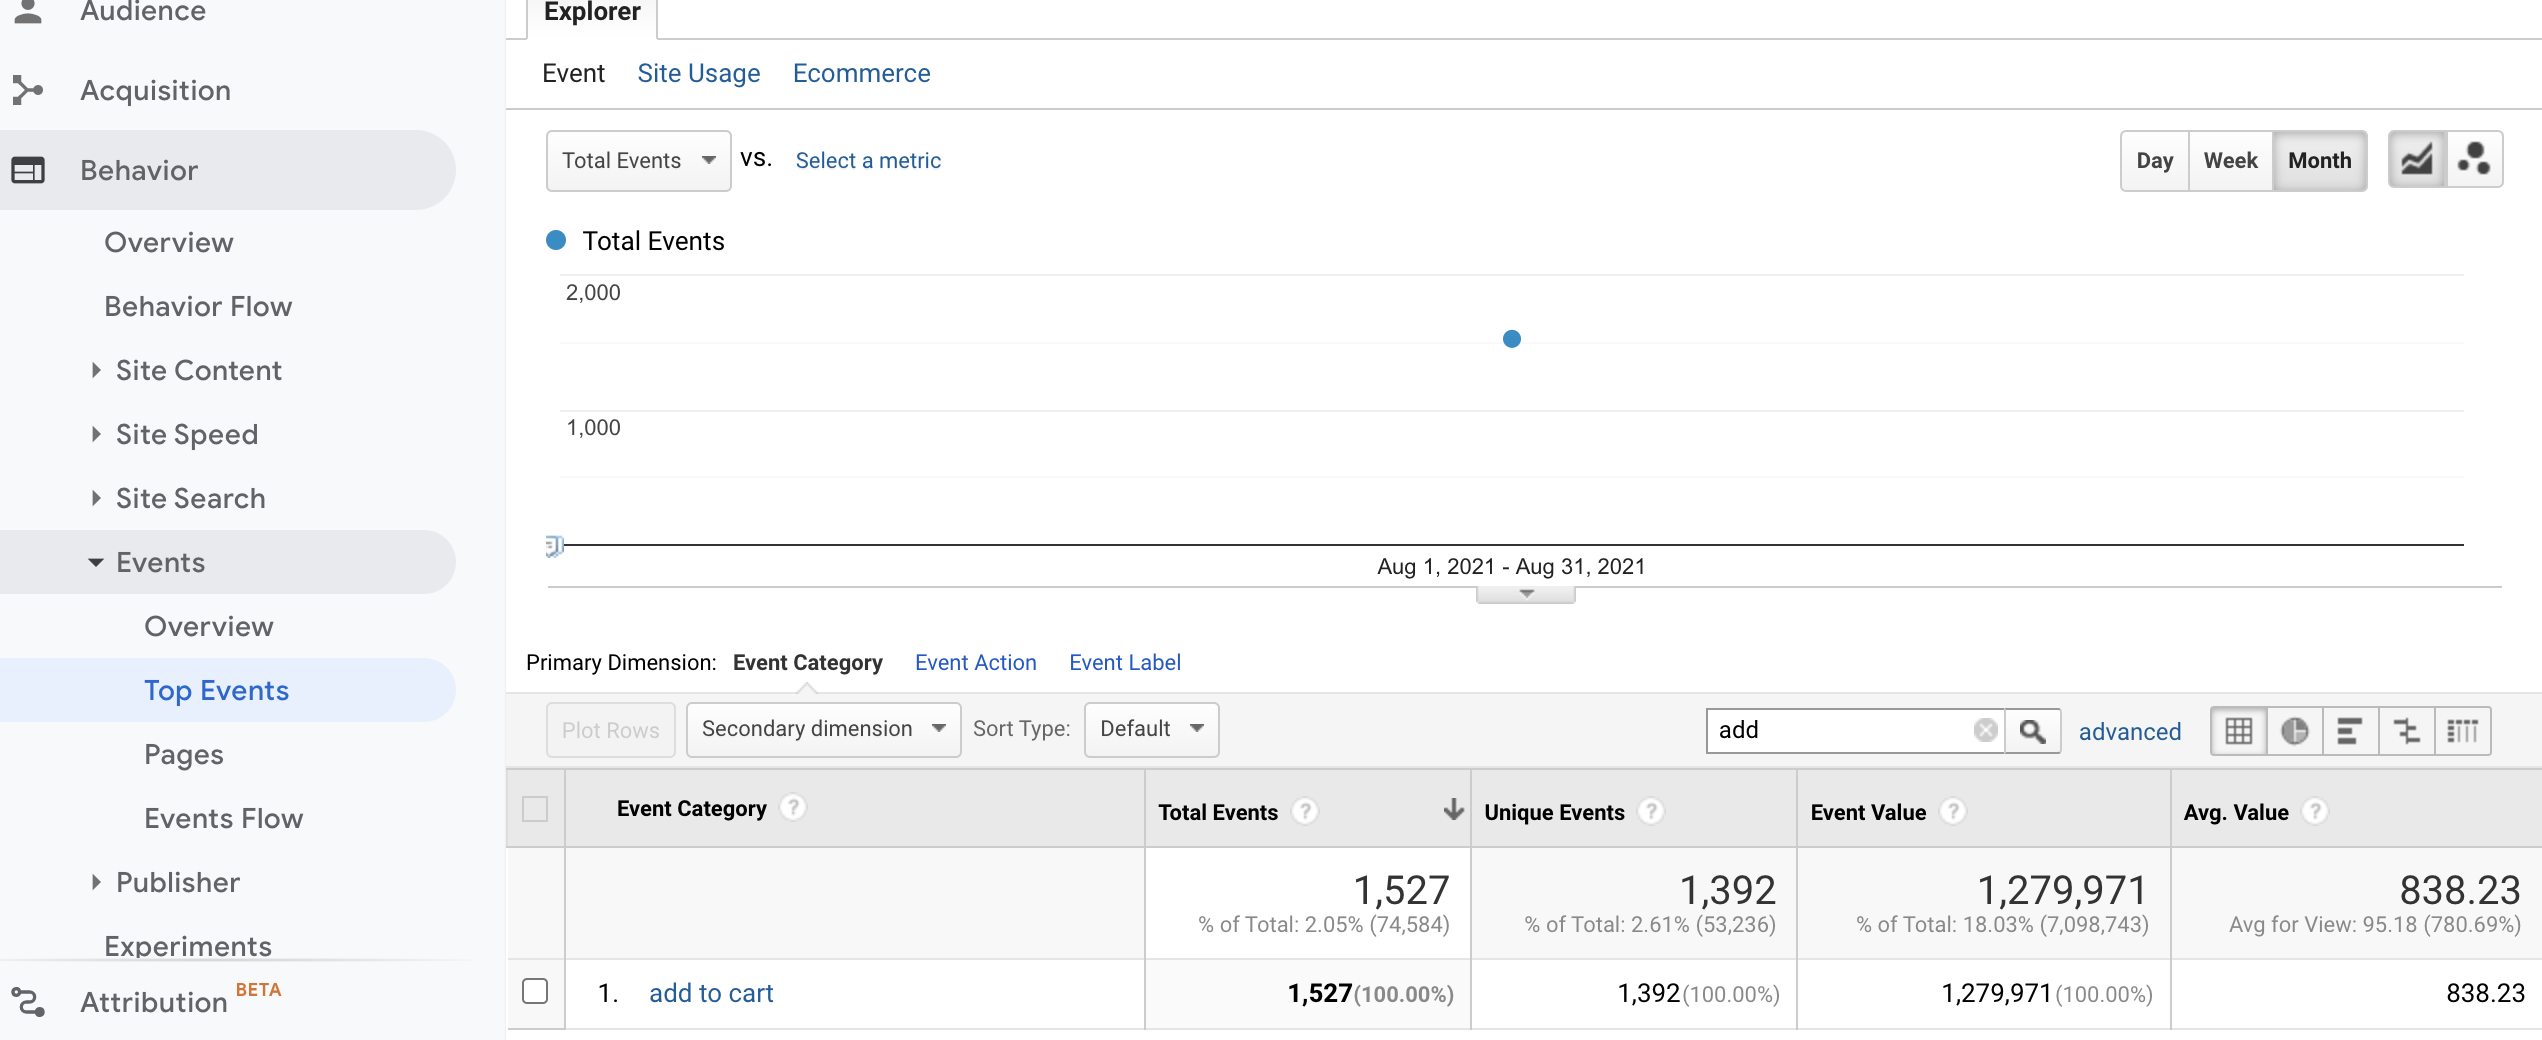
You can check it in Behavior → Events → Top Events section. At the first glance, you see an event category but if you click on the 1. position you will see the event action and then the event label - so you can adjust it to your needs.
DataLayer tool
You can also check what analytic events are sent to GTM in very simple way with DevTools in your browser. Just type window.dataLayer and you'll see all events sent to GTM - How you can see to GTM are sent a lot of analytic events and we will not use all of them - that's why we need Tags and Triggers which we were setting above - they are instruction which analytic events are important for us and what we want to do with those events (send to GA, connect with Facebook Ads etc).
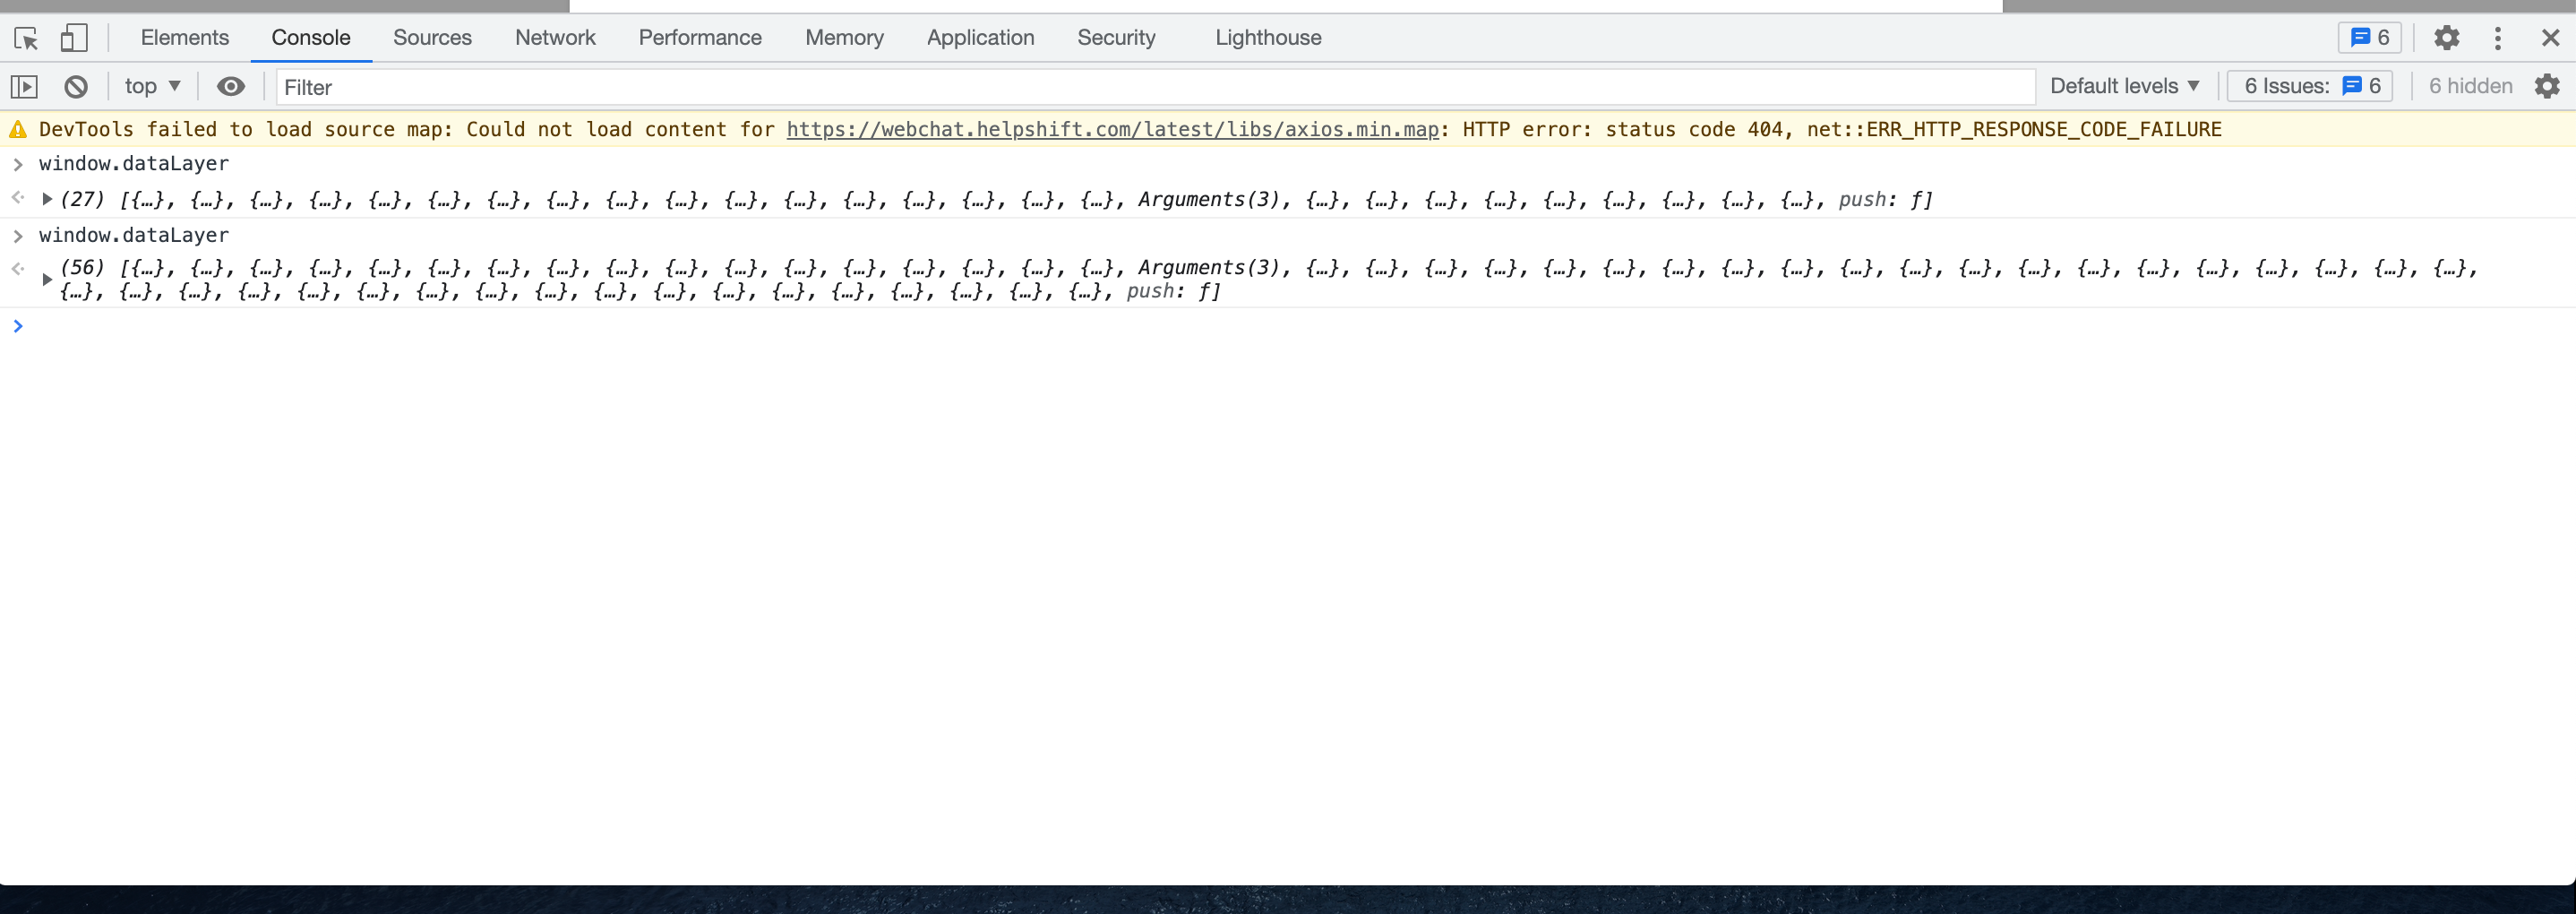
Between first and second call of window.dataLayer I've added something to the cart on the web - that's why the number of analytic events is doubled. Add to cart event is also tracked.

It's very helpful tool, especially in debugging where you can check if event is sent correctly - if yes - then Google Tag Manager console is your next step to check if everything is set properly.
I hope that provided guide will help you in integrating Google Analytics events through the Google tag Manager. Remember that you can implement google analytics directly in your code and you don’t have to use Google Tag Manager middleware for this - but in a case when you plan to use GTM in other areas, it is wise to implement it in this way because then you can extend google tools in an easy way.
In the next article I’ll write how to set up the ecommerce plugin and use it to measure your shop performance.